Sharpening chisels could be a huge task and believe it or not, sandpapers are good materials to make this work. You would be surprised at the change it could bring to your tools, especially on a chisel's blade and edge.
I have to be honest that it may not be the best way to sharpen those chisels, but it is definitely the best alternative that would actually work.
Today, you will learn how to do sharpening chisels with sandpaper the right way. The benefit of doing it would be seen in your budget.
More...
2 good reasons to use sandpaper for this method
1. Affordability
Before I move on to this tutorial, you have to know why you need to have an alternative in sharpening your chisels.
There is a known way to do it, which involves water stone and other diamond stones. The problem with those materials is that they are ridiculously expensive!
Imagine, water stones are worth $100, why do that when you can buy sandpaper for just $1! It is crazy how you will save a lot using sandpaper, so might as well try it.
2. Level of difficulty
Using sandpaper for this task is so easy that you will find this tutorial not complicated at all. Bottomline, it will only not save you money, but will definitely save you time as well.

Via: popularwoodworking.com
Prerequisites or materials for sharpening chisels
- Sandpaper in different grits (You can have the 80, 220, 400, 800, 1000, 1500 and 2000 grits)
- Adhesive spray
- Flat surface (it could be a desk, a flat table or even your floor)
- Acetone
- Brush
- Grinding wheel (optional)
- Honing guide (also optional)
Step-by-step guide on how to sharpen your chisels with sandpaper
1. The grind
Use this step only if the chisel is in really bad shape. This portion allows you to sharpen the chisel's tip with the use of a grinding wheel.
Don't ever do this at the chisel's back part because that is supposed to be flat. You don't want that to have a 90-degree tip because that won't help in doing the job that it is supposed to do.
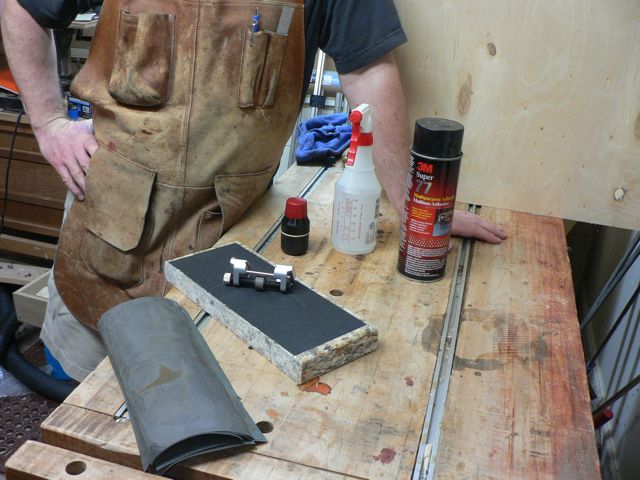
2. Preparing the workspace or the working table

Via: thousanddollarshop.blogspot.com
Get an 80-grit sandpaper and start sanding the back of the chisel. This will help in removing all the rust that is in there and even the pits that have been stuck in there for a long time.
Use your adhesive spray for the back of your sandpaper and put it on the edge of the flat surface you choose to work on.
3. Sharpening the back
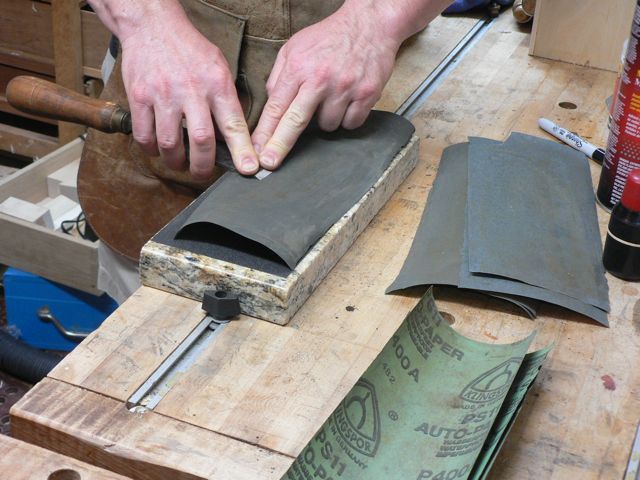
Once you have prepared the flat surface along with the sandpaper that comes with it, you now need to have the chisel's back pressed against your sandpaper that is on the surface.
Go back and forth with your chisel on that surface, as you hone it carefully. Make it a point that your chisel remains flat on your workspace because the back part of this tool has to stay that way.
NOTE
You will notice that there will be some metal filings that will come off of your chisel and they will be all over the sandpaper.
It is your job to remove them using a brush so they don't clog up your sandpaper, which would eventually make it difficult for you sand the chisel.
4. Remove sandpaper
This is the part where honing the back of the chisel ends.
As soon as you see that the sandpaper is no longer working because it has already worn out, you can now peel it from the flat surface and use some acetone to get rid of the residues caused by the honing.
Use a towel to completely clean the space.
5. Sharpening the main bevel

Via: thousanddollarshop.blogspot.com
Once you are done with the chisel's back, you can now move on to the main bevel. Use the 80 grit sandpaper to hone the bevel.
Sanding could be tricky for this one because you have to be really careful and make sure that you are aware of the angles linked to it.
NOTE
If I were you, I'll get a honing guide to make sure that I am honing it in a precise angle.
What you need to do is set the honing guide to the said angle and have your chisel inserted there.
6. Removing wire edge
The sharpening procedure could result in a wire edge that you will soon find dangling on the edge of your chisel.
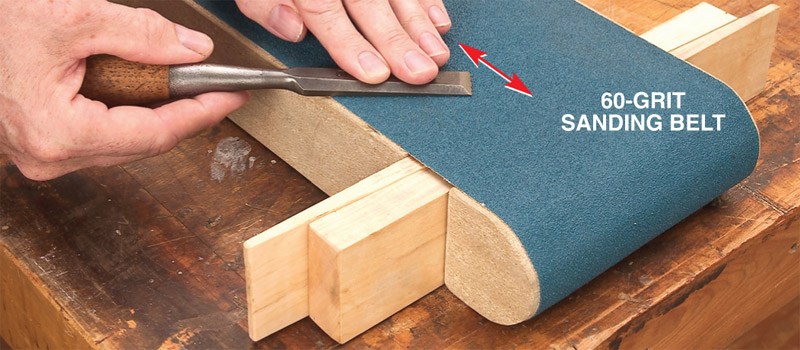
You will need to remove that by rubbing chisel's front part on a belt that you strapped the bevel with. Drag that part of the chisel towards you and then turn it upside down.
Do it until you see the sharp part of the chisel clean without that wire edge
7. Final touch
Once you are done with all of these steps, wipe your chisel clean and put it in a piece of a sheath and then also, put it in a tool bag.
This will prevent the item from rusting and maintaining having sharp edges.

Conclusion
Sharpening your chisels using sandpaper is not only easy, but it is highly economical. The best way to hone a chisel is to use materials like a water stone, but it is also always the most expensive method, which is impractical.
With sandpapers, you don't have to worry about spending more than $10 for the whole process (and probably even spend less than that).
Other than sandpapers, you will still need some small tools like a spray adhesive. Don’t worry because they are all easy to find and are also affordable. Now that you have this guide, it won’t be hard for you to do it yourself.
Feel free to share this tutorial to your friends as well. Have fun!
